
How to Crochet with Two (or More) Colors
Easily crochet with two colors like a pro and learn how to add, switch and change colors (for projects in the round and flat), how to carry yarn, and how to catch floats (on both right and wrong side rows). This technique is a mix of Intarsia, Tapestry and Fair-Isle Crochet. You’ll be a master of colorwork in no time!
Before we begin, I would like to thank you for visiting Jo to the World Creations, a site dedicated to helping you give the gift of crochet.
More free patterns (that make awesome crochet gifts) are on the way! Sign up for my emails, follow me and never wonder “What should I make for…” again!
FREE PATTERNS FOR CROCHET GIFTS
Delivered to your inbox
AND GET A FREE PDF OF THE LOVE PILLOW
& A FREE CROCHET CHEAT SHEET
Unsubscribe at any time.
Delivered Socially
Follow Me on
How to Crochet with Two (or Multiple) Colors
When you learn how to crochet with multiple colors (called colorwork) the pattern design opportunities are endless. Here I’ll explain the easiest way to way to add, change, switch colors mid-row for both flat projects and in the round. Before you know it, you’ll be going back and forth between two (or more) colors like a pro!
How to Switch Colors – Crochet Video Tutorial
For step-by-step video instructions on how to switch colors in crochet and how to crochet with multiple colors, you can watch this video tutorial. Or scroll down for the written guide.

Colorwork Techniques
There are three common techniques for crocheting with multiple colors (called Colorwork):
- Intarsia: uses bobbins of yarn for each color section. Two or more colors can be used.
- Tapestry: involves carrying both strands of yarn from end to end or around and hiding the unused color under the stitch.
- Fair-Isle Crochet: also involves carrying both strands of yarn from end to end or around but the unused color is floating in the back of the work.
How I crochet with two colors is a bit of a mixture of each and it changes depending on the project. You could say that I primarily use Fair-Isle Crochet (which is sometimes referred to as Carrying Yarn technique) but instead of carrying the yarn from end to end, I attach and use colors only when I need them (which is similar to Intarsia). So let’s just call the method I use: the Super Simple Colorwork technique.
This technique works best when the pattern calls for working with two colors in all single crochet stitches and the wrong side won’t be shown. It’s great for items such as crochet hats, pillow covers, mug / can cozies, etc that have a hidden inside. For items like blankets and scarves where both sides are shown, you would typically use either Tapestry or Intarsia techniques.
Super Simple Colorwork Technique
What is it?
This Super Simple Colorwork Technique involves carrying the opposite colored yarn behind your work, keeping the strands that are being carried neat and tidy, and ensuring the color of yarn that you need is always nearby. All of this is explained below.
How do you do it?
When following a pattern or chart that has two colors, you’ll be using only the first color and crocheting normally until it comes time to add the new color.
So now you’re at the point in the pattern when you need to add your new color.
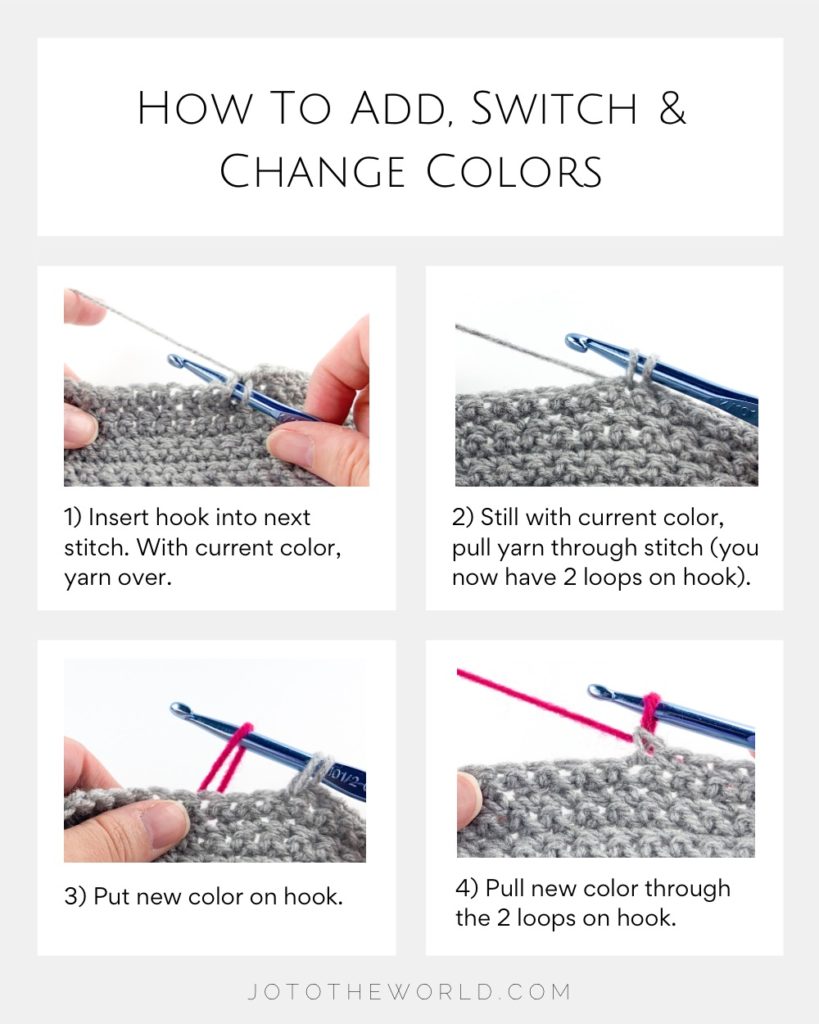
How to Add your New Color:
- Insert hook into the next stitch. With the color you are currently working with, yarn over.
- Still with the current color, pull yarn through stitch (you will have two loops on your hook)
- Now, instead of finishing the single crochet stitch as you normally would, put the new color on your hook
- Pull the new color through the two loops on your hook
- Leave the old color hanging (keep it attached to ball of yarn or bobbin, don’t cut)
- Give the old color a slight tug to keep stitch tight
That’s it! Simple, eh? Yes…I’m Canadian 🙂
Ok, so now you are going to be working with your new color.
You’ll be using this new color until the pattern says to switch.
Sometimes you only use your new color for one stitch and other times you’ll be using it for most or all of the row.
How to Switch Back to your Old Color (Change Colors):
The old color is right where you left it, just hanging there. When the pattern says to use it again, you follow the same exact steps as you did to add the new color:
- Insert hook into the next stitch. With the current color, yarn over.
- Still with the current color, pull through stitch (you will have two loops on your hook)
- Instead of finishing the single crochet stitch as you normally would, take the color you are not working with (that is hanging from your work), put it on the hook.
- Pull it through the two loops on your hook.
- Leave the color that is not on the hook hanging (keep it attached to ball of yarn or bobbin, don’t cut)
- Give both colors a slight tug to keep stitch tight
And just like that, you’re working with the old color again.
Where to Add/Switch/Change Colors When Following a Pattern
So now you know how to add and switch colors but where do you do it?
When you follow the steps to add/switch colors (insert hook into next stitch, yarn over, put the new color on the hook and pull it through the two loops), you are essentially setting up to use the new color in the next stitch. You can see that the stitch is actually completed with the old color, even though you have the new color on your hook. The stitch you just completed while setting up the new color, counts as a stitch with the old color. The next stitch you complete with the new color on your hook will count as a stitch with the new color.
Therefore, you always add/switch colors on the stitch before the pattern calls for the new color. When you see the pattern (either in written instructions or on a pattern chart) call for a new color, you follow the steps to add/switch color in the stitch BEFORE.
Where to Add/Switch Colors when Following Written Instructions:
If the pattern reads:
With MC sc 3, with CC sc 5, with MC sc 2
Here’s what you’ll do: with your main color, single crochet for two stitches. On the third stitch, follow the steps to add/switch color (even though you are adding your new color here, it is still counting as a stitch with the old color). With your new color (the contrasting color), single crochet for four stitches. On the next stitch (the 5th stitch), follow the steps to add/switch colors (again, even though you are adding your new color, it will count as the final CC sc 5 stitch). Single crochet with main color for two stitches.
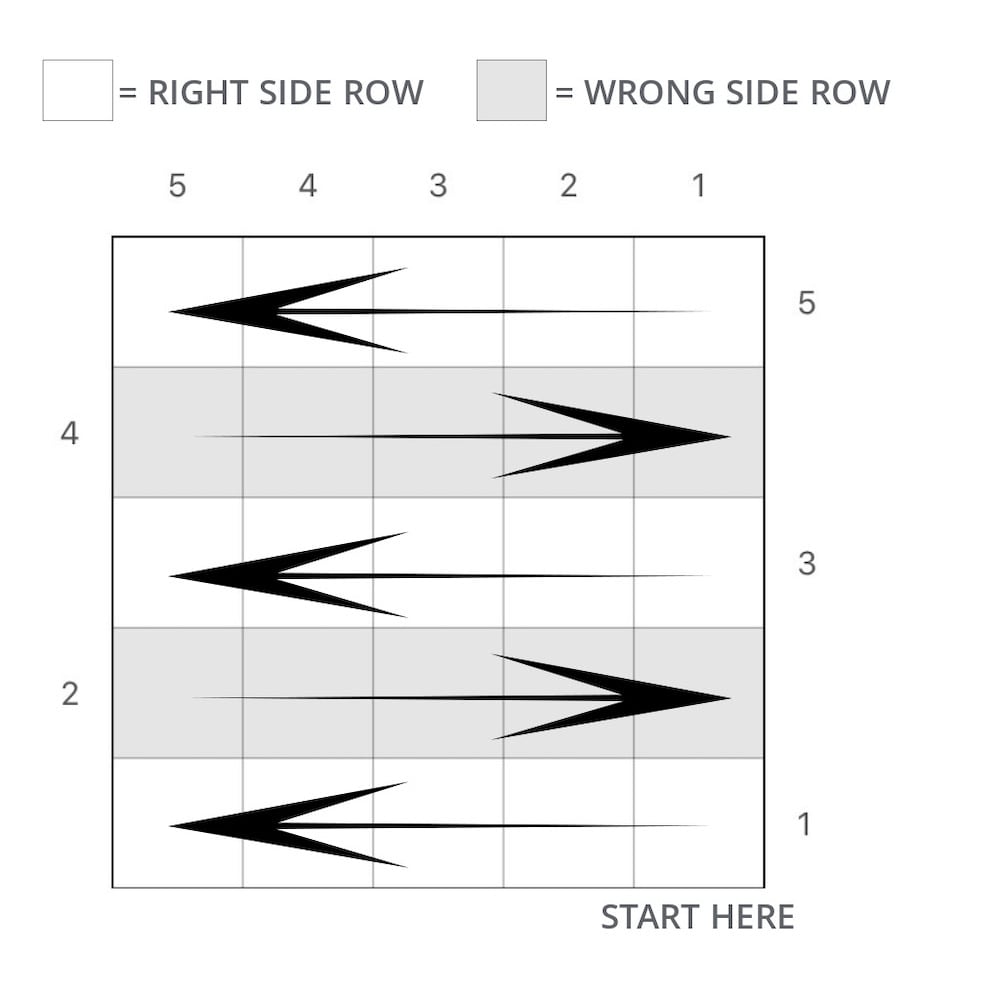
Where to Add/Switch/Change Colors in Crochet When Following a Chart:
The chart above shows the same directions as the written instructions above but in chart form. Here’s what it means: with your main color, single crochet for two stitches. On the third stitch (in the pic above – where the arrow on the right is pointing), follow the steps to add/switch color (even though you are adding your new color here, it is still counting as a stitch with the old color). With your new color (the contrasting color), single crochet for four stitches. On the next stitch (in the pic above – where the left arrow is pointing), follow the steps to add/switch colors (again, even though you are adding your new color, it will count as the final CC sc 5 stitch). Single crochet with main color for two stitches.
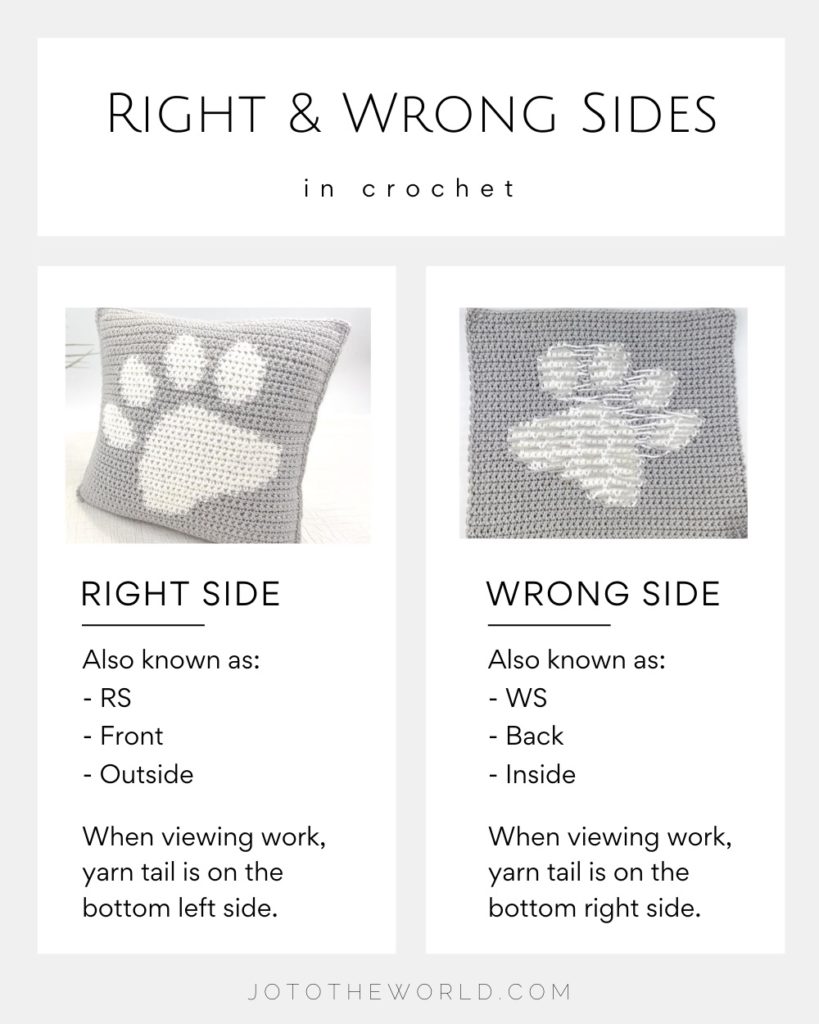
Right Sides and Wrong Sides
The front and the back are really important in colorwork.
The front of your work, the part that you’ll see, the outside, is called the Right Side. The crochet abbreviation is RS.
The back of your work, the part that you won’t see, the inside is called the Wrong Side. The crochet abbreviation is WS.
Note that the sides are often called:
Right Side (RS): the front or outside
Wrong Side (WS): back or inside
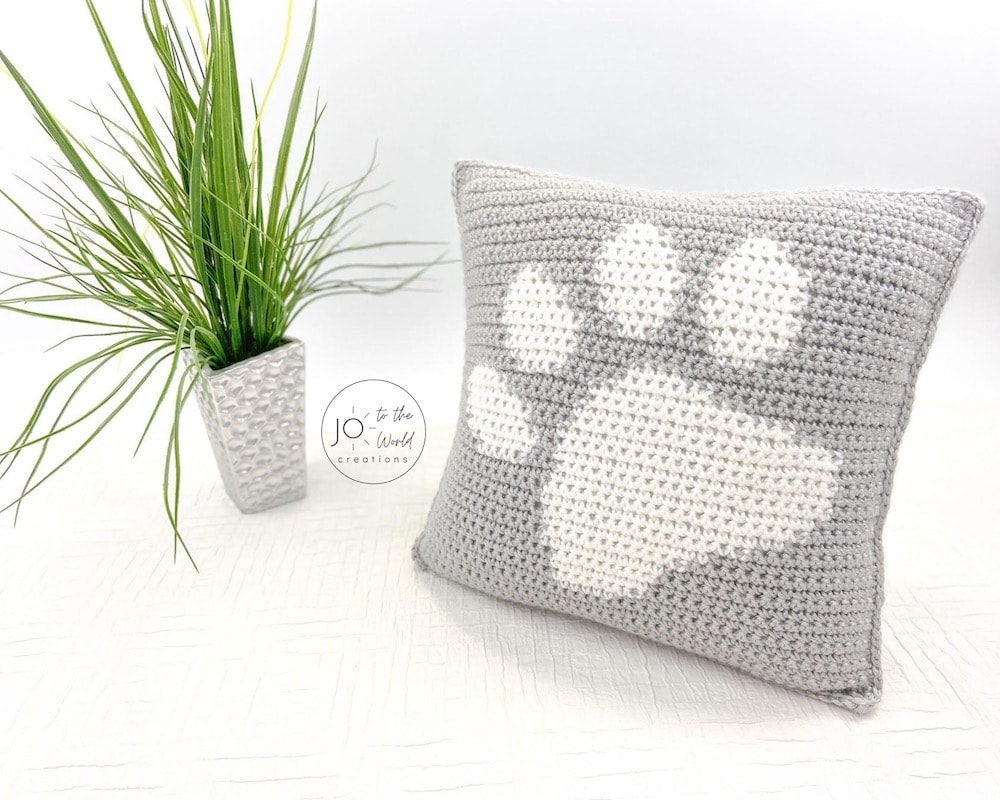
As an example, for my Paw Print Pillow Cover Crochet Pattern, the right side is the front or outside is what you’ll see when the pillow is on display (as shown in the the picture below on your left). The wrong side is the back or inside that you don’t see (as shown in the picture below on your right).
Colorwork on Right and Wrong Sides
When working with two colors, the color that is not being used will be carried along the wrong side / back / inside of the work.
All the loose strands will essentially be floating along the back (as shown in the above picture on your right).
When you add/change colors make sure the strands are floating along the wrong side. You don’t want strands floating in the front of your work. This gets easier as you complete more of the project but at the beginning when you first start working with two colors, make sure you know which side is the right side and which is the wrong side and keep all strands in the back.
Super Simple Colorwork Technique in the Round
If you’re working on an item in the round (like a hat or a can cozy), you’ll always be working on right side rows. You will be carrying the yarn in the back all the way around.
Tip: It’s best to use always use stitch marker on your first stitch of a row to keep track of which row you are on as you won’t be able to easily tell.
If your pattern tells you to change colors every 2-3 stitches the strand of yarn that’s floating along the back won’t be too long. Strands of yarn floating in the back that are really long run the risk of getting snagged and pulled on (by for example, the soda can going into the can cozy or your head going into a hat).
To prevent these pieces of carried yarn that are floating in the back from becoming too long, we “catch” them and incorporate them into the back of a stitch.
This is called Catching Floats.
When working in the round, I try not to go more than 3 stitches with one color before “catching” the opposite color. That way the inside looks neat and the floats are tucked nicely along the back of the work.
Catching Floats in the Round
When working in the round, you will always be working on the front so you only need to learn how catch floats on the right side.
Here is how to catch your float when working in the round (which is always the right side):
- Insert your hook into the stitch and take the strand of the opposite color and place it on the hook (behind the stitch).
- Yarn over with the color you are working with and pull through.
The opposite color should not have come through but instead be caught in the stitch (hidden from the front of the work). Give the opposite color a little tug.
When to Catch Floats in the Round
You don’t need to catch your float every 3 stitches if there’s a color switch. You only need to catch your float if you are using the same color for more than 2-3 stitches, then you’ll want to catch the opposite color.
This 2-3 stitches rule isn’t an exact science. You don’t need to go every 2 or every 3 stitches, you can vary it up. I never like to do 4 stitches without catching my float.
Super Simple Colorwork Technique Flat
When working on flat projects, you will be crocheting across right side rows, turning your work and crocheting across wrong side rows.
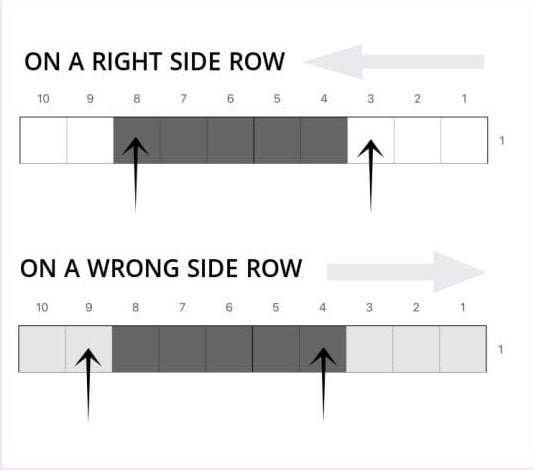
Unlike many crochet project projects where you follow a pattern chart in the same direction for each row, when working with two colors and carrying yarn back and forth, you read a pattern chart from right to left on right side rows and left to right on wrong side rows.
How to Follow a Pattern Chart when Working with Two Colors on a Flat Project
Tip: My pattern charts always have the wrong side row shaded in light grey and the number of the row in the place where you start the row (like the picture below) to help you remember that you’re working on a wrong side row. If your pattern chart doesn’t do this, print it out and draw arrows on the wrong sides to help you remember.
Catching Floats when Working with Two Colors on a Flat Project
If your pattern tells you to change colors every 2-3 stitches the strand of yarn that’s floating along the back won’t be too long. Strands of yarn floating in the back that are really long run the risk of getting snagged and pulled on (by for example, the pillow insert going into the pillow cover.
To prevent these pieces of carried yarn that are floating in the back from becoming too long, we “catch” them and incorporate them into the back of a stitch.
This is called Catching Floats.
When to Catch Floats on a Flat Project:
- When working on a flat project, I try not to go more than 4-6 stitches with one color before “catching” the opposite color. That way the inside looks neat and the floats are tucked nicely along the back of the work.
- You don’t need to catch your float every 4-6 stitches if there’s a color switch. The catching of the float is only if you are using the same color for more than 4-6 stitches, then you’ll want to catch the opposite color.
- This 4-6 stitches rule isn’t an exact science. You don’t need to go every 4 or every 5 or every 6 stitches, you can vary it up. I like to make sure I never do 7 stitches without catching my float.
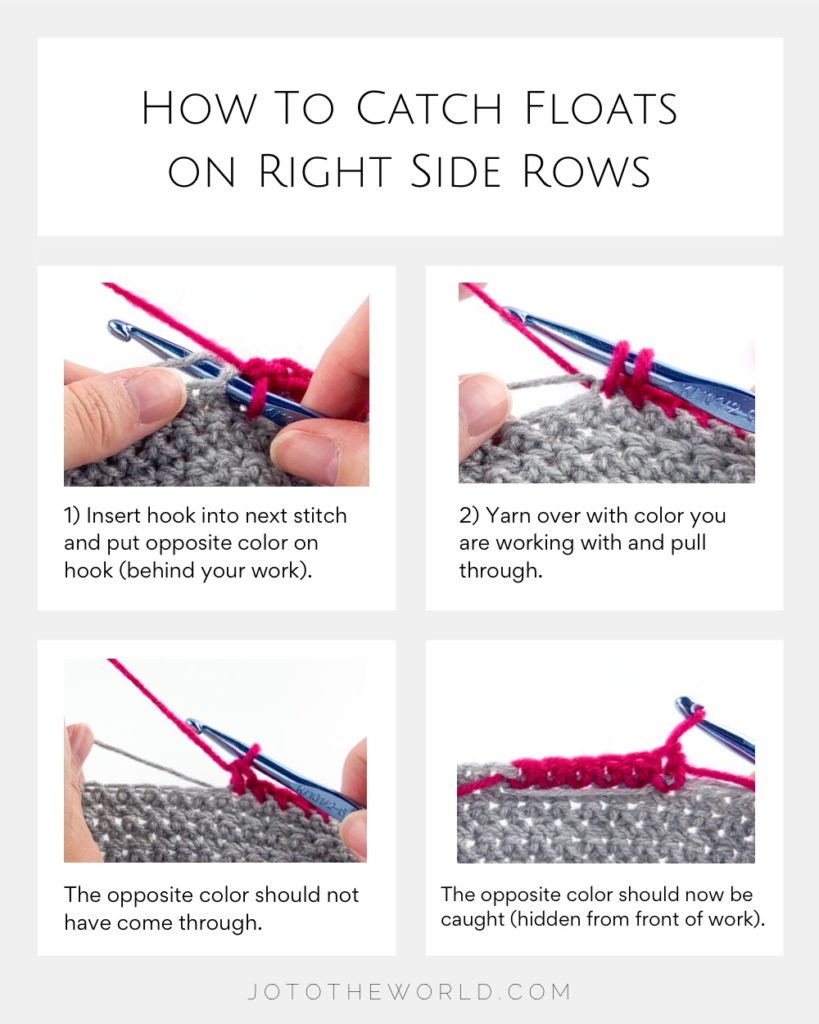
How to Catch Floats on Right Side Rows
There are two different ways to catch floats – one way when you are working on the right side and a different way when you are working on the wrong side.
Here is how to catch your float when you are working on a right side row (the front or outside of your work is facing you):
- Insert your hook into the stitch and take the strand of the opposite colour and place it on the hook (behind the stitch).
- Yarn over with the colour you are working with and pull through.
The opposite colour should not have come through but instead be caught in the stitch (hidden from the front of the work). Give the opposite color a little tug.
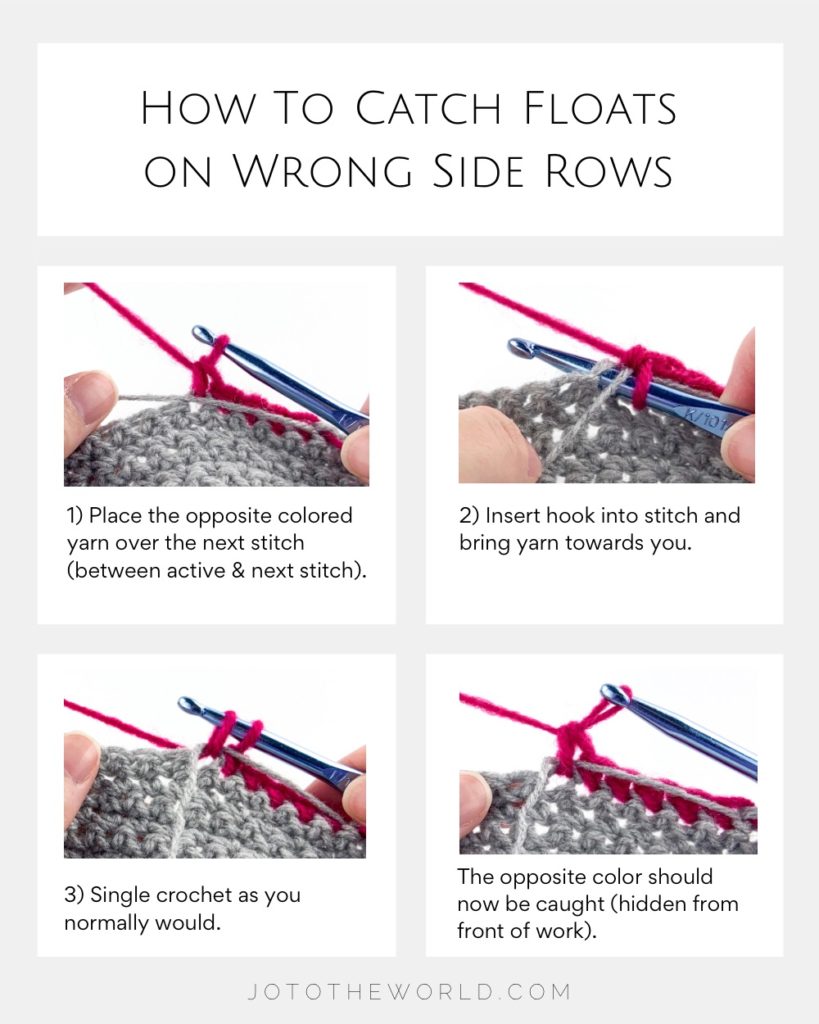
How to Catch Floats on the Wrong Side
Here is how to catch your float when you are working on a wrong side row (the back or inside of your work is facing you:
- Take the strand of yarn you are trying to catch (the opposite colour) and put it over the next stitch. Simply place it there (in the middle between your active stitch and the next stitch).
- Insert your hook into the next stitch. Take that piece of yarn that you just placed and bring it towards you. That puts the yarn in the middle between the yarn on your hook and your new stitch. Single crochet as you normally would.
The opposite color should now be caught. Give the opposite colour a little tug.
Methods to Ensure the Color You Need is Always Close By
You’ll want to ensure that the correct color is close by when you need it. There are a number of ways to do this:
Method # 1: Carry your yarn from end to end
(Note: this is often referred to as the Fair-Isle Technique)
By carrying both colors all the way around for a project in the round or from the beginning to the end of a row for a flat project, you’ll ensure that either color will always be close by when you need it. Even if the pattern doesn’t call for the opposite color to be used, by catching your floats, you’re keeping the opposite color nearby at all times. That means, when it comes time to use the opposite color again, it’ll be hanging only two or three stitches away from your active stitch.
Method # 2: Using the contrast color only when you need it
Leave Yarn Hanging
Or, you can look at a pattern and see where you will need the opposite color for the remainder of the row and for the following row and determine if it will be easy to pick back up again. If it is, you can just leave the contrast color hanging because it will be right there where you left it.
For example (that applies to either in the round or a flat project): if you were making a can cozy or a pillow (or any other project) with the letter “I” on it (with the letter “I” in the contrasting color), you could simply add the contrasting color when you get to the “I,” then when you’ve completed the stitches with that color, leave it hanging while you work with the main color for the remainder of the row. On the following row, when you approach the “I” again, the contrasting color will be right below and you can easily pick it up, use it for the letter.
You can use this method in the round if there is only a small part of the contrast color (like a letter “I” for example) but otherwise you’ll want to carry your yarn all the way around.
Carry Yarn to Set Up Next Row
When using this method for flat projects, there is more freedom and you can carry the opposite color to where you will need it. This saves you from having to carry it from end to end. To do this, look at the following row and where you’ll need the contrast color. If you are going to need the contrast color in a different place then where it will be left, you’ll want to “set up” the next row before you get to it by carrying the yarn to a specific place.
For example, (that applies to a flat project) if you were making a can cozy or a pillow (or any other project) with the letter “T” on it, you would be following the above example until you get to the horizontal part (the top) of the “T”. In the row before the top of the “T,” you’ll want to carry your yarn close to where that top of the “T” begins. Then you can drop it, finish the row with the main color, start the next row with the main color and the contrast color will be close when you need to start the top of the “T.”
Method # 3: Attach and use bobbins
First, what’s a bobbin? A bobbin is just a small ball of yarn. If the pattern called for two bobbins of the contrast color and you happen to have the same two balls of that yarn, you can use your yarn directly from the ball if you would like. Or, you can take large strands of the contrasting color and wind them up into a bobbin so that the yarn doesn’t get tangled. The pattern will often tell you how long the strand of yarn should be to make into a bobbin. More on making a bobbin below.
For this method, let’s start with an example. Say that you are working on a crochet hat and there are two letter “I”s – one on the front and one on the back. You can always use method # 1 and carry the contrasting color yarn all the way around. Or, you can attach one ball of yarn (or bobbin) for the letter “I” on the front and a second ball of yarn (or bobbin) for the letter “I” on the back.
This way, you don’t need to carry the contrasting color all the way around and it will be nearby when you need it. You can do this for both projects in the round and flat. And you can attach as many balls of yarn (bobbins as you’d like).
For example, if you didn’t want to carry your contrasting color yarn and you wanted to make 10 letter “I”s around your hat, you could attach 10 bobbins. It’s totally your preference!
Working with Bobbins:
As mentioned in the method above, you make the strands of yarn into a nice little ball of yarn (called a bobbin) to help the strands from getting tangled.
You can make your own bobbin with anything you can wrap your yarn around. You could use a large crochet hook, a glue stitch, an empty paper roll for example. Anything that you can wrap your yarn around and then take out. Knifty Knittings has a great tutorial on how to do this here.
To make a bobbin, wrap your yarn around your object 6 or so times. Then rotate your object 1/3 of the way away from you. Wrap the yarn around 4 times and rotate 1/3 of the way away from you. Keep repeating this. With the ball shape forming as you wrap, when you wrap at the top, put your yarn as close to your object as possible and same when pulling it towards you at the bottom. Rotate every 4 times around. When the yarn is completely in the ball, remove object.
And that’s it!
Look what you learned!
- How to add a new color mid-row, how to switch back to the previous color mid-row – both in the round and flat
- Where to add, switch and change colors
- How to catch floats in the round and on flat projects (on both the right side and wrong sides)
- How to carry your yarn from end to end
- How to carry your yarn only when needed and move it to be closer to the next row
- How to add and use bobbins
- Tips for keeping your yarn untangled
Colorwork Patterns


I’m Jo, the designer behind Jo to the World Creations, and I’m dedicated to helping you make the perfect crochet gift! I love designing and sharing free crochet patterns that you can make for every gift occasion.
About →Let’s Connect
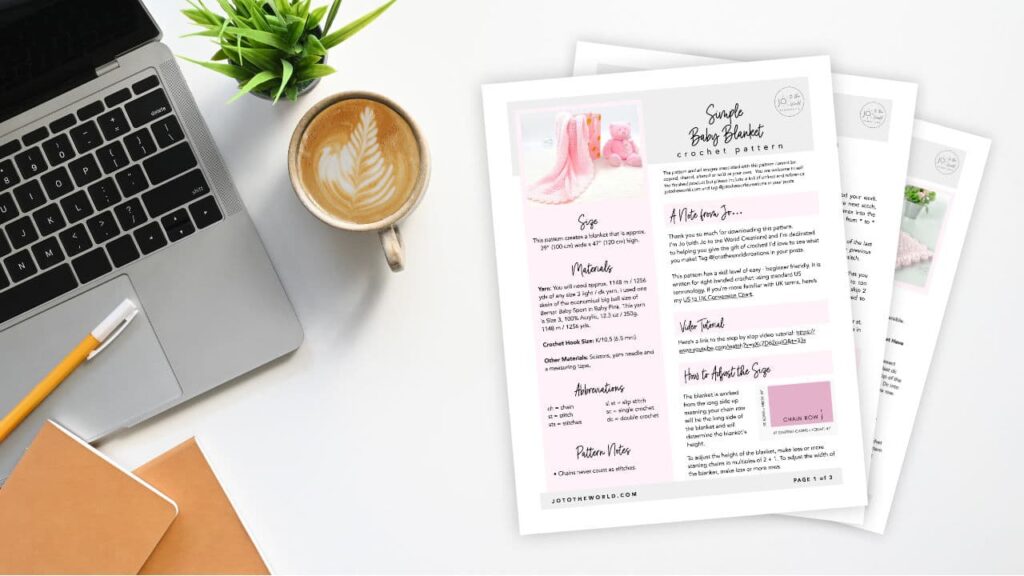
Download. Print. Keep.
Get Instant Access to ALL Printable Patterns
Make your crocheting more enjoyable, relaxing and productive with printable PDF patterns.
- 100+ premium crochet patterns.
- Download, save and print from any device.
- No ads or popups!
Not sure yet? Take a look at the Pattern Library and see all the patterns you can download once you’re a member.

Save with Pattern Bundles
For a limited time, I’ve grouped some of my most popular crochet patterns and I’m offering them as pattern bundles where you can get the printable versions for one low, discounted price. Check out these incredible Crochet Pattern Bundles.
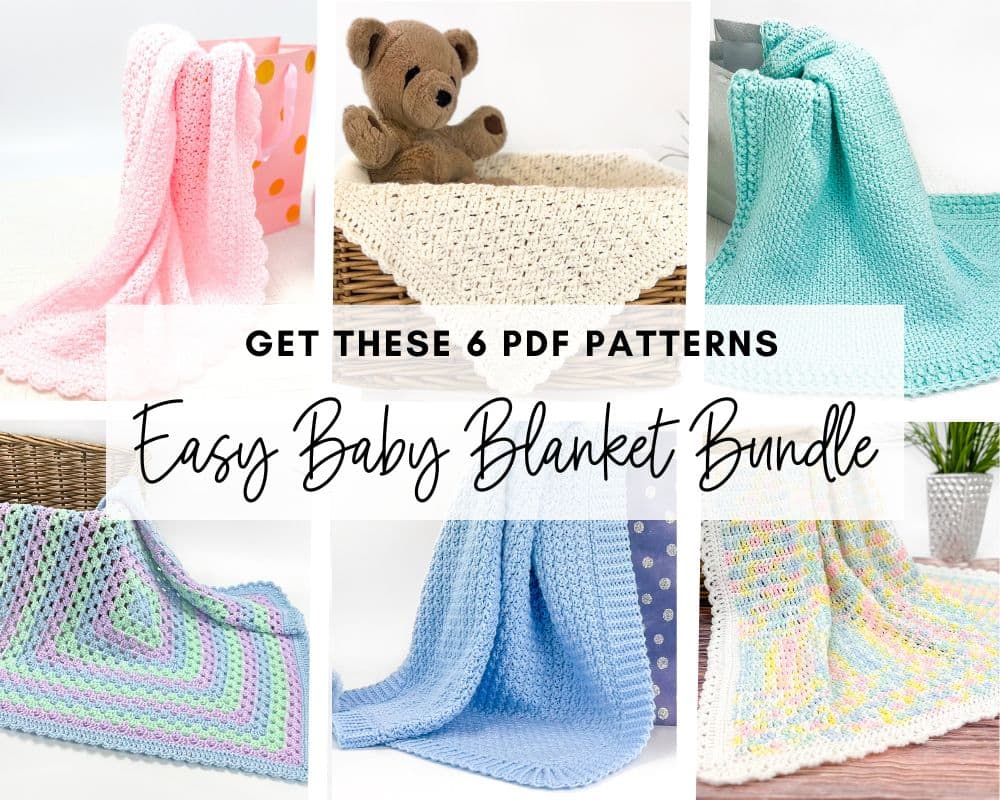
Easy Baby Blanket Bundle
With this Easy Baby Blanket Bundle, you’ll get SIX easy crochet baby blankets as printable downloads. Each pattern includes step-by-step instructions and a full video tutorial.
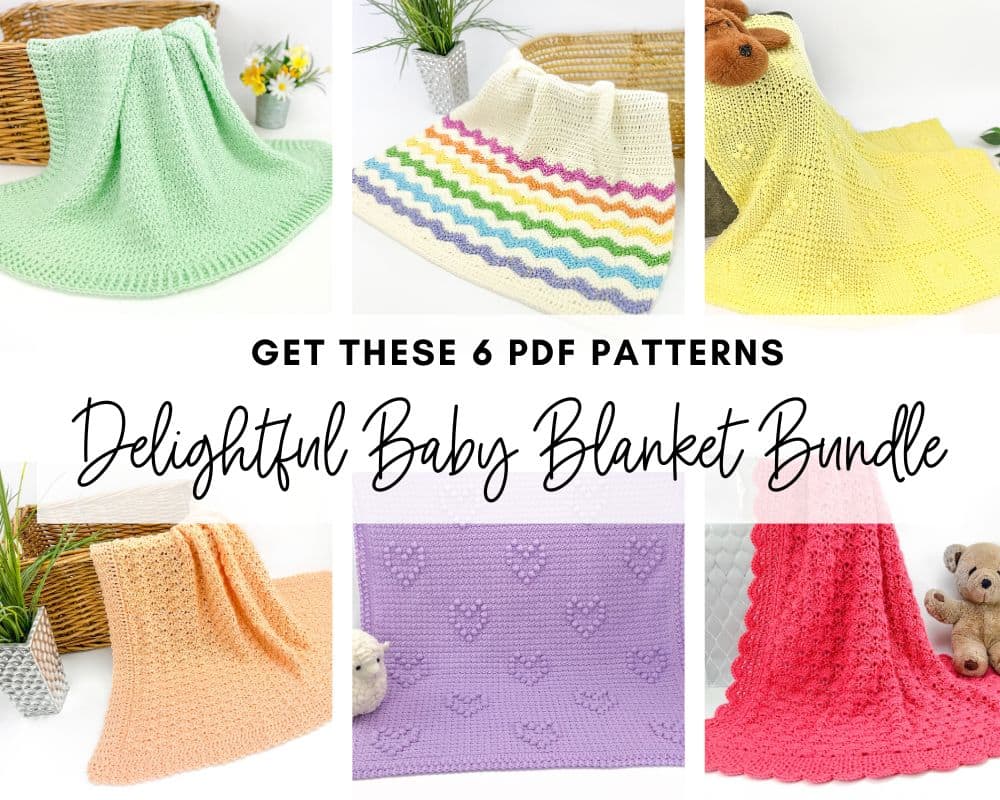
Delightful Baby Blanket Bundle
This incredible deal includes six SIX blanket patterns that are a delight to make and create truly stunning blankets – all as printable PDFs for one low, discounted price.
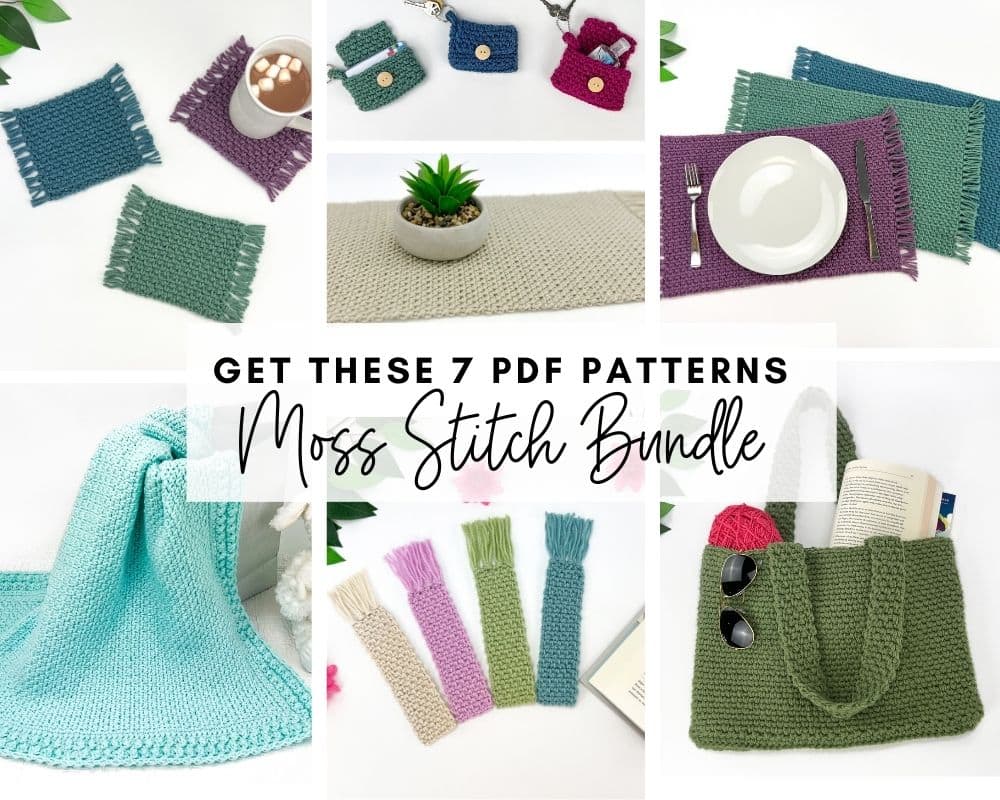
Moss Stitch Pattern Bundle
All your favorite Moss Stitch patterns in one bundle! Get SEVEN easy Moss Stitch crochet patterns as ad-free, print-ready PDFs to print, save and keep forever.
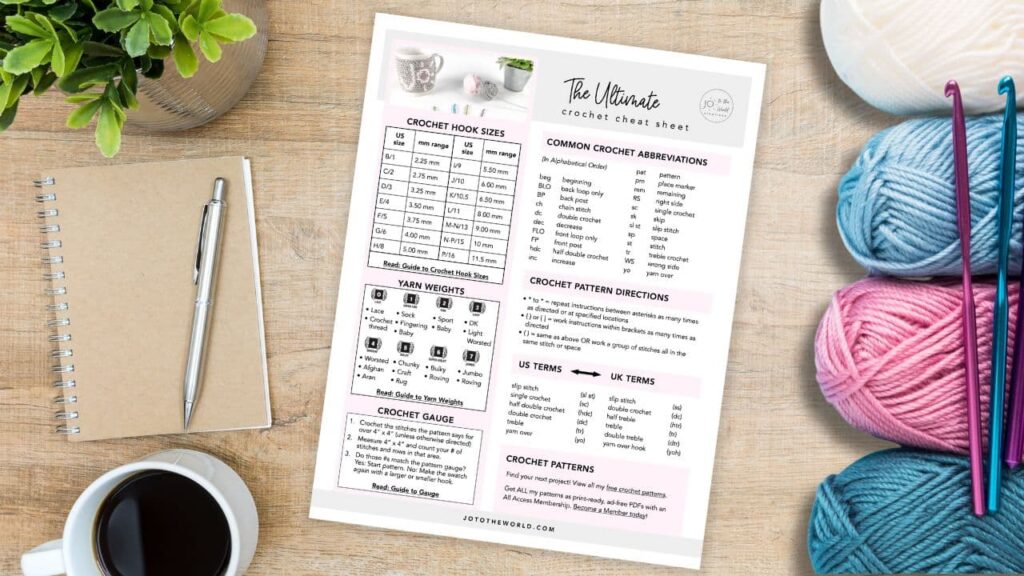
Free Crochet Cheat Sheet
Get instant access to this Ultimate Crochet Cheat Sheet! Plus you’ll receive free patterns for crochet gifts delivered right to your inbox!
Featured Crochet Patterns
Pattern Collections


Free Patterns for Crochet Gifts
Never miss a pattern! Get all my secrets to making incredible crochet gifts as well as new free crochet patterns and exclusive deals when you sign up for my newsletter (it’s free!).